
Part of my ongoing series on email deliverability. If you’re new here, start with what a Sender Authentication Package actually is and Private Domains in Marketing Cloud Engagement, then come back for the Next version.
If you have configured a Sender Authentication Package in Marketing Cloud Engagement, you know the drill. You buy the SKU. You fill in a form. You decide whether to delegate the subdomain to Salesforce’s name servers or host the DNS yourself. And if you’re like most of the clients I’ve worked with, you delegate, hand over the zone, and let the Marketing Cloud provisioning team do the rest. One order, one support case, and every branded subdomain shows up: `cloud.`, `click.`, `view.`, `image.`, `bounce.`, `reply.`, `mta.`. Seven jobs, one purchase.
Marketing Cloud Next domain setup does not work like that at all. There is no SKU to buy, no provisioning team, no zone file to hand over. There are three or four separate configurations in Salesforce Setup, each with its own DNS work, its own validation step, and its own failure mode. And one of them, the tracking link domain, hands you an SSL certificate to manage for the rest of the product’s life.
This is not a complaint. Owning your own DNS is architecturally better: no delegated zone, no support case to change a record, no waiting on someone else’s queue – you retain complete ownership. But it moves work that used to sit inside a Salesforce SKU onto your side of the line, and if nobody notices that has happened, it surfaces about eleven months later as a wall of certificate warnings on every link in every email you’ve sent.
Here’s what changed, in the order you’ll hit it.
The mental model shift
The single most useful thing to internalise is that SAP was a product and Marketing Cloud Next domains are an architecture. The branding that came bundled in Engagement is now multiple independent decisions:
| Job | MC Engagement (SAP) | MC Next |
| Sending / From domain | SAP subdomain, provisioned by Salesforce | Authenticated Domain in Unified Messaging Setup, DNS by you |
| Click tracking links | ‘click.<sap domain>’ = automatic | Setup > Links, one domain + your own CA-signed certificate |
| Landing pages | ‘cloud.<sap domain>’ = automatic | My Domain and/or Custom Domain on the Salesforce CDN |
| DNS control | Delegate the zone (NS records) or self-host | Always yours = CNAMEs and TXT in your own zone |
| SSL for domains | Purchased SKU, but Salesforce procures, installs and renews | Free via the CDN for pages but entirely yours for tracking links |
Three consequences fall out of that table, and they’re worth stating plainly before we get into screens:
- Nothing is “the account domain” anymore. You can absolutely end up with a sending domain, a landing page domain and a tracking domain that have nothing to do with each other, because nothing forces them to align. In SAP they aligned by construction.
- Your DNS team is now in the critical path for every one of these, not just once at provisioning.
- Certificate lifecycle is a new job that did not exist in your Engagement operations manual. More on this below, because it’s the part that really annoys me.
Step 1: The authenticated sending domain
This is the closest thing to the old Private Domain, and it’s the least painful of the three. Once you’re in, the flow is short:
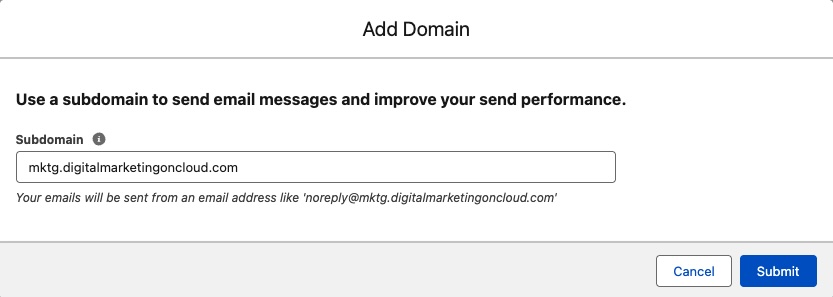
1. Add a subdomain. Use a subdomain, not your top domain: mktg.digitalmarketingoncloud.com, e.example.com, news.example.com. The reasoning is the same as it has always been: mailbox providers assess reputation at the domain level, and you do not want your corporate web traffic, your transactional mail and your marketing sends sharing one reputation. Salesforce shows you the resulting address pattern (lukas@mktg.digitalmarketingoncloud.com) so there’s no ambiguity about what you’re committing to.
2. Create a From address: display name plus username. You get one at creation time; additional ones go in Setup > Authenticated From Addresses, using the same authenticated domain. Worth knowing early if your marketing team expects to send as five different personas.
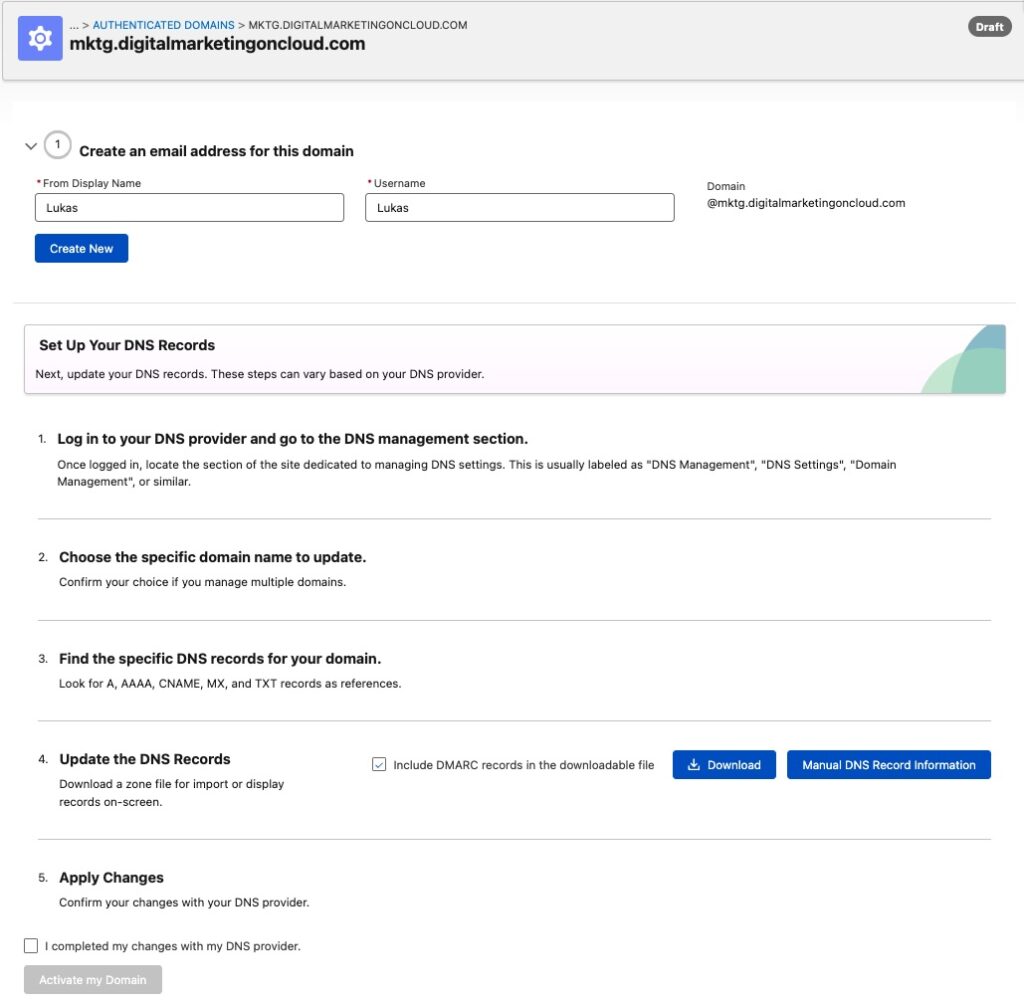
3. Publish the DNS records. You can download a zone file for import, or click Manual DNS Record Information and copy them out one at a time:
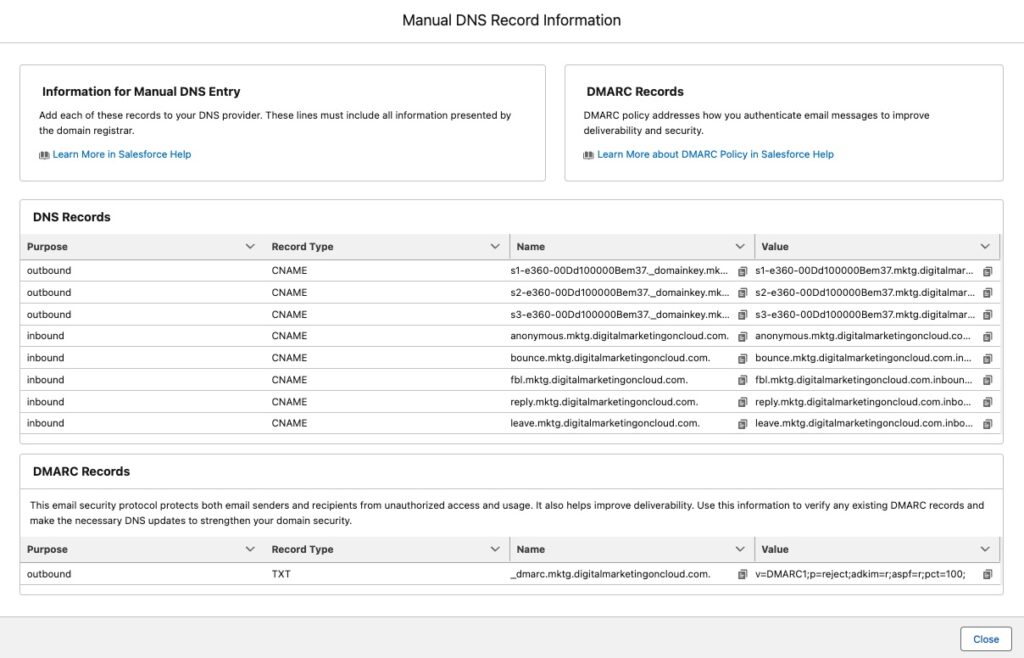
That DNS list is where the architectural difference becomes concrete. In my own setup it came out as:
Three outbound CNAMEs: ‘s1-‘, ‘s2-‘, ‘s3-e360-<orgid>._domainkey.mktg…’. These are your DKIM selectors, aliased to Salesforce’s keys. Three of them, so Salesforce can rotate signing keys without you touching DNS again.
Five inbound CNAMEs: ‘anonymous.’, ‘bounce.’, ‘fbl.’, ‘reply.’, ‘leave.’. Bounce processing, feedback loop, reply mail management and unsubscribe handling. If you skip the inbound records because “we don’t use reply management”, you are also skipping your bounce and complaint plumbing. Don’t cherry-pick this list.
One optional (but recommended) DMARC TXT record at ‘_dmarc.mktg…’.
Read the DMARC default before you paste it. Salesforce offers ‘v=DMARC1;p=reject;adkim=r;aspf=r;pct=100’. That is a genuinely good policy, and it’s refreshing to see a vendor default to enforcement rather than ‘p=none’. But ‘p=reject’ on day one, on a subdomain whose DKIM records were published four minutes ago and haven’t propagated, is how you discover the difference between a policy and a plan. My standing advice hasn’t changed: publish the record, start at ‘p=none’, read your aggregate reports for a couple of weeks until you can see every legitimate stream authenticating, then tighten. Also check what’s already at your organisational level. If the top domain publishes a policy with ‘sp=’, that subdomain policy is already governing this subdomain, and adding a record here overrides it. Coordinate with whoever owns your top domain DMARC record. That is rarely the marketing team.
Then tick I completed my changes with my DNS provider, activate, and verify. Propagation is documented as up to 72 hours, but in practice it’s usually much faster. If verification fails, the Authenticated Domains page gives inline errors per record telling you which one didn’t match what Salesforce expected, that’s the screen to screenshot and send to IT, rather than “DNS doesn’t work”.
Note what did not happen anywhere in that process: nobody asked you for NS records, and nobody took over a zone. Every record above lives in DNS you control. That’s the trade: full control, full responsibility. But more work for you, as any potential changes to the DNS settings on Salesforce need to be updated by you, in your zone.
Step 2: Landing pages
Two independent options here, and you can use either or both.
My Domain is the simple change: keep ‘my.salesforce.com’ and just brand the subdomain, so ‘data-drive-1574.my.salesforce.com’ becomes something recognisable (which it in most cases already is). In my case this could be digitalmarketingoncloud.my.salesforce.com.
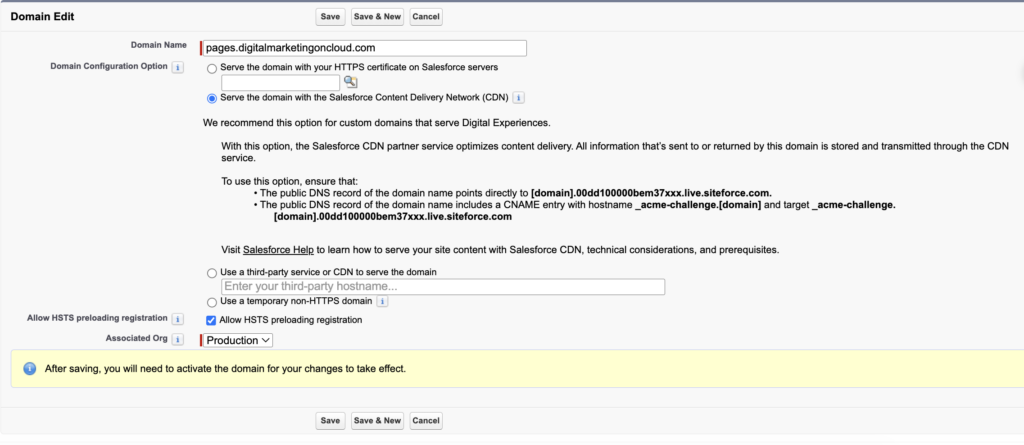
Custom Domain (recommended) is the full change: serve your Marketing Landing Pages (which are Experience Cloud sites underneath) from a domain you own. Setup > User Interface > Sites and Domains > Domains > Add a Domain, then add a Custom subdomain, you will be using for landing pages:
Few things to check before you commit to this:
- Serve the domain with the Salesforce CDN. This is the recommended option in Marketing Cloud Next, and it’s the one place in this whole article where SSL is still handled for you, a shared certificate, at no cost. The CDN checkbox for Commerce LWR / Experience Delivery sites determines whether your CDN partner is Cloudflare (checked) or Akamai (unchecked).
- Publish the CNAMEs before you save. You need the site CNAME and the matching ‘_acme-challenge’ CNAME in place, or the save fails. Provisioning then runs up to 24 hours, status moves to Awaiting Activation, you click Activate, and the domain flips to HTTPS.
In my case the CNAMEs needing publishing would be:
pages.digitalmarketingoncloud.com pointing to
pages.digitalmarketingoncloud.com.00dd100000bem37xxx.live.siteforce.com as well as _acme-challenge.pages.digitalmarketingoncloud.com pointing to: _acme-challenge.pages.digitalmarketingoncloud.com.00dd100000bem37xxx.live.siteforce.com
So yes, the target domains for CNAME records will be quite long, and it is expected.
Step 3: Tracking links, and the certificate you now own
This is the section to read twice, as it has details which surprised me the most.
Left alone, click tracking in Marketing Cloud Next produces links like ‘https://cdp91.tracking.e360.salesforce.com/click?…’. Functional, unbranded, and a visible tell in every email you send. To brand it you configure a tracking domain, and unlike everything above, this one requires a CA-signed HTTPS certificate that you create, get signed, upload, and renew…. Well – I didn’t expect that!?
Let’s start with putting constraints up front, because they shape the design:
One tracking domain per org. Not one per brand, not one per business unit. One. For us working with SAP domains in MC Engagement this is even more restrictive, as one could have multiple tracking domains per environment, as long as it was only one per Business Unit.
It must also be different from your landing page domain. This is also fine, as we will probably call it something like: click.digitalmarketingoncloud.com
Once activated, a tracking domain cannot be disabled, only deleted. And deleting it does not repair links in emails already sent. Cached configuration can also mean the odd send still uses a domain you’ve removed.
If you run multiple brands out of one org, decide now what a single shared tracking domain means for them, because you won’t get a second one.
And first on the list – the certificate flow
This might seem counterintuitive, as one would expect to have the subdomain in place BEFORE a certificate is required, but here you will need the certificate later, in tracking domain creation process.
1. Go to Setup > Security > Certificate and Key Management > Create CA-Signed Certificate.
2. Fill in the details. The field that matters is Common Name: this is the exact subdomain your links will use, ‘click.digitalmarketingoncloud.com’. Key size 2048. Everything else is organisational metadata.
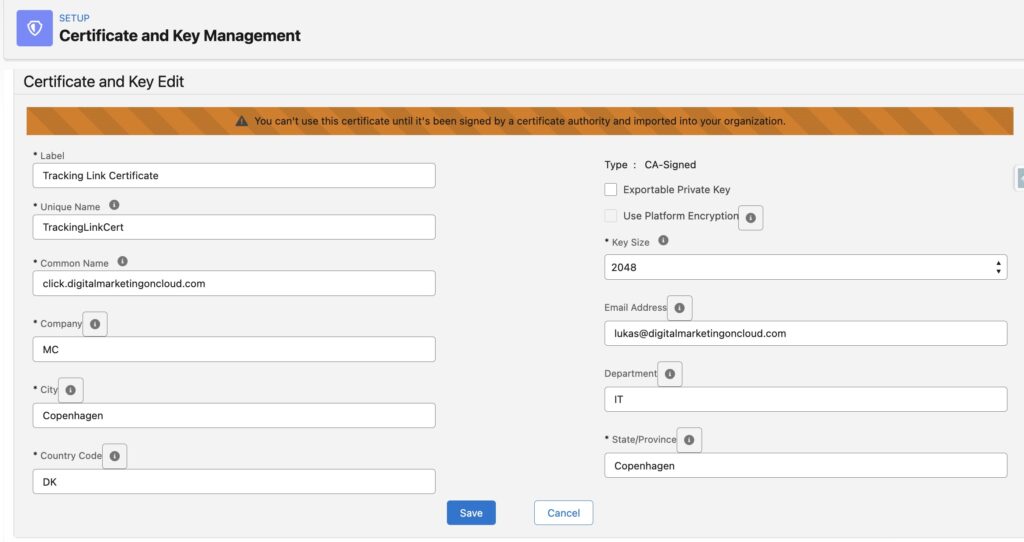
3. Name it for the date. After saving, only Label and Unique Name remain editable, so put the expiry or issue date in the label (‘TrackingLinkCert_2027-09’ beats ‘TrackingLinkCert’). Future-you, staring at a list of certificates in a red state, will be grateful.
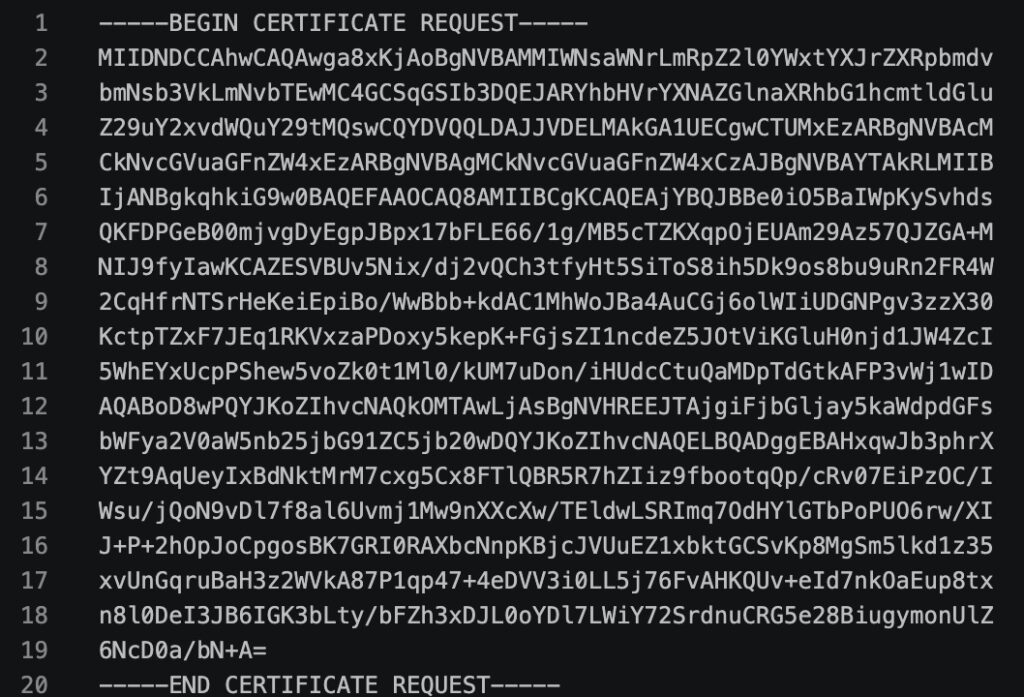
4. Download the Certificate Signing Request. You get a .csr file: a ‘—–BEGIN CERTIFICATE REQUEST—–‘ block that encodes the common name and your public key – like this one below:
5. Send the CSR to a Certificate Authority.
6. Upload the signed certificate back onto the same record. Status goes Active.
Then go to Setup > Links (in the Email section of Unified Messaging) > New Domain: enter the subdomain, select the certificate, save. Open Details, publish the CNAME record it gives you, wait for propagation, and toggle the status to activate. Your links are now branded.
What happens when it expires?
An expired certificate shows in red in Certificate and Key Management. Depending on the browser, recipients clicking a tracked link get a certificate warning instead of your website. Not a bounce, not a suppressed send, not anything that shows up in a send report, just silently broken clicks, on every email you have ever sent that is still sitting in an inbox. An expired tracking certificate doesn’t break your next campaign. It breaks your entire back catalogue.
Your safety net is two automated emails from Salesforce with the subject “One or more of your Salesforce certificates expires soon”, sent 10 days and 1 day before expiry. Consider where those emails land. They go to Salesforce admins, in an org where certificate notifications sit alongside every other platform notice, ten days before an event whose blast radius is every link in every marketing email. In Engagement, this was Salesforce’s problem: you bought the SSL SKU and the provisioning team procured, installed and renewed it. In Next, ten days’ notice in a shared inbox is the whole system.
So build a better one:
- Stop thinking of this as an annual task. This is the part that surprises people, so here are the dates. In April 2025 the CA/Browser Forum required reducing the maximum lifetime of a publicly trusted TLS certificate down in three steps: 200 days from 15 March 2026, 100 days from 15 March 2027, and 47 days from 15 March 2029. Domain control validation reuse periods shrink alongside them. The first step is already in force, the “one-year certificate” is no longer a thing you can buy, and CAs are in practice issuing 199 days rather than 200. So the renewal cadence for your tracking domain is roughly twice a year today, three or four times a year from March 2027, and close to monthly from 2029. Design the process for that trajectory, not for the annual renewal you’re used to.
- Book the next renewal the day you upload a certificate. Not a reminder ten days out, a task 45 days out, owned by a named person, with the renewal runbook attached, and a recurring series behind it rather than a single entry.
- And you cannot automate your way out of it. Salesforce rotates its own platform-managed certificates automatically. Certificates you generate and upload yourself get none of that: there’s no ACME support in Certificate and Key Management, no auto-renew on the record, no integration with your CA. The renewal is a human generating a CSR, a human getting it signed, and a human uploading the result on every single cycle.
- Renew on the existing certificate record, not by creating a new one. This matters more than it sounds. Your activated tracking domain in Setup > Links references a specific certificate, and an activated domain can’t be edited or disabled, only deleted, which breaks every link already in the wild. So the renewal path you want is the one that keeps the same certificate record: regenerate the signing request on that record, get the new CSR signed, and upload the signed certificate back onto it. Salesforce helpfully won’t let you delete a certificate that’s in use.
- Write down the CA, the requesting process and the internal approver. The person who renews this next cycle will not always be the person who set it up, and the CSR-to-CA step usually involves a procurement or security workflow that isn’t discoverable from inside Salesforce.
- Never let the tracking domain be the last item on a go-live checklist. DNS propagation, a CA turnaround and a security review do not compress into launch week – so make sure to start with this item.
The part that isn’t in the documentation
Everything above is procedure. The reason I wanted to write it up is the operating model underneath it.
In Engagement, domain configuration was a procurement event. You bought the Sender Authentication Package, you filled in a form, and the platform absorbed the ongoing operational burden. DNS in a delegated zone, certificates renewed by someone from Salesforce. The architect’s job was to specify it correctly once.
In Marketing Cloud Next, domain configuration is a standing operational responsibility split across three teams that don’t usually sit together: marketing owns the requirement, IT owns DNS, security owns certificates. Nothing in the product tells you that. You discover it when a CNAME needs changing and marketing doesn’t have access, or when a certificate expires and nobody had the calendar entry.
Which means the deliverable at the end of a Marketing Cloud Next domain design isn’t a screenshot of a green status. It’s a short document naming, for each of the domains: who requested it, who holds the DNS, who renews the certificate, and where the runbook lives. The ownership model is the part that has to survive a reorg.
Sharing sender domain across both generations
If you’re migrating from Engagement, you can actually reuse the same sender domain. To initiate the “sharing process”, navigate to Setup > Marketing Cloud > Marketing Cloud Engagement > Additional Features > Email Readiness for Marketing Cloud Next:

Clicking on Manage will immediately show you the domains used in your MCE Org – either SAP domains or Private Domains:
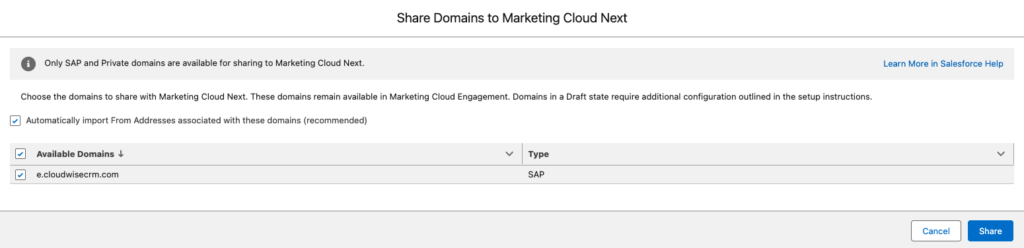
Mark those which you want to migrate, and click Next.
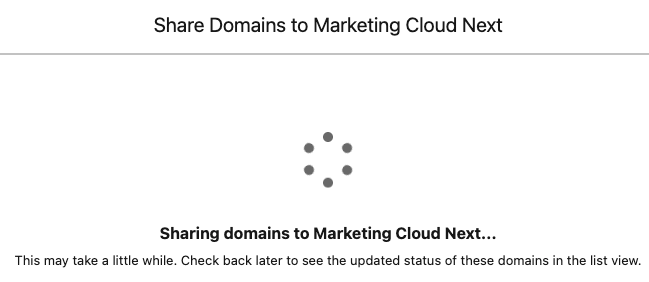
The spinner will spin for some minutes, before it confirms the domains being made available in MC Next. If needed, download the zone file, and implement the records with your DNS provider:
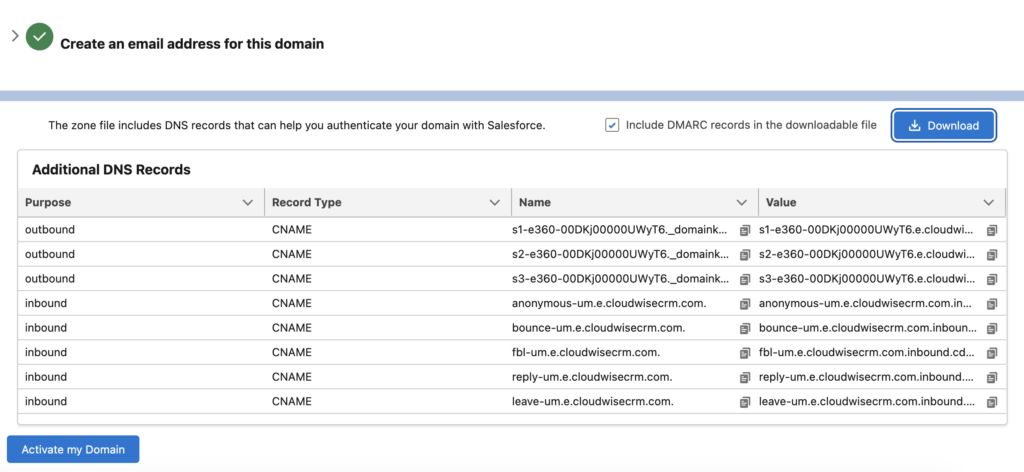
It might take some time for the records to be visible to Salesforce. This is why you can provide a notification email address, for getting an update once the domain is ready.
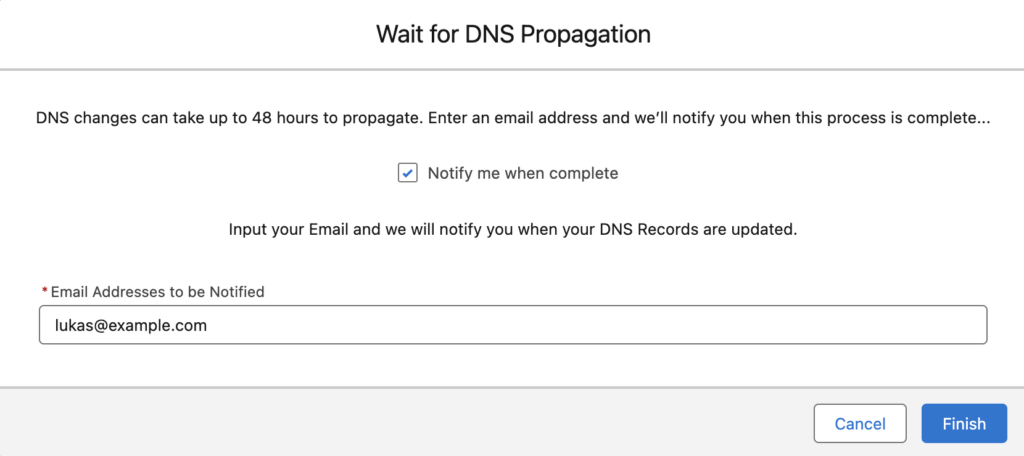
Once processed, the domain is displayed with Active status, under Authenticated Domains list in Setup.

Do keep in mind, that sharing your domain across MCE and MC Next does not share the sending infrastructure, so your emails – while going out from the same domain across both environments, are going out from separate sender IP addresses. This is you should still be mindful and roll out your volume slowly, if you decide to start sending from MC Next on your MCE domain.